Rear Brake Caliper
SAFETY FIRST: Protective gloves and eyewear are recommended at this point.
It is not necessary to remove the brake hose from the caliper to change the brake pads. Do not push down the brake pedal when the disc is not between the pads.
Brake Pad Replacement
The brake fluid hose doesn't need to be drained or the caliper removed to replace the brake pads.
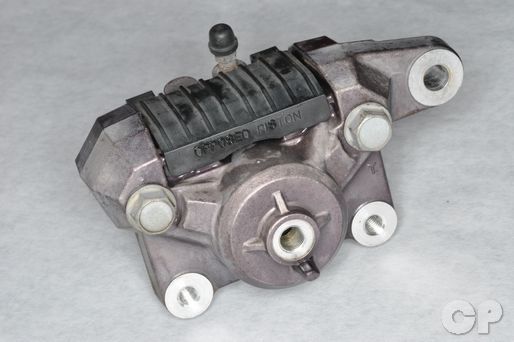
Remove the brake pad cover from the caliper.
Pull the two clips out of the pad pins.
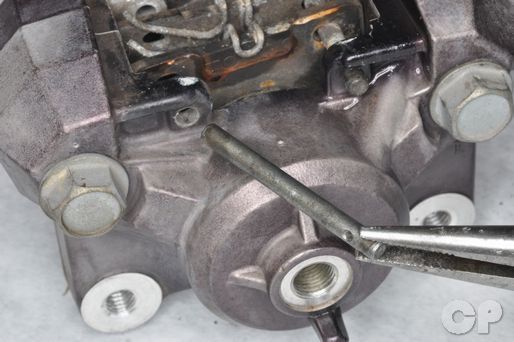
Remove the two pad pins. The springs can fly out as the pins are removed.
Remove the springs and the brake pads.
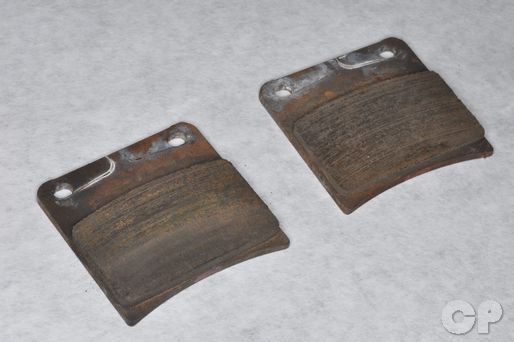
Inspect the wear of the brake pads. If a pad is worn past its wear indicator or has uneven wear replace both pads for that caliper.
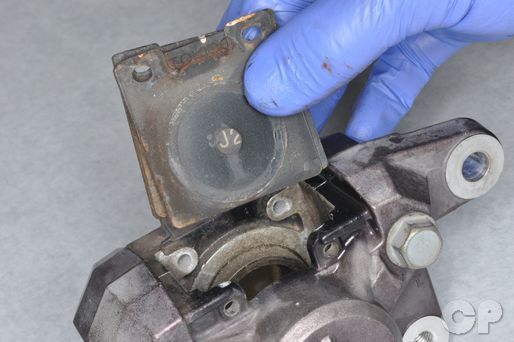
Install the brake pads, springs, and pins into the caliper.
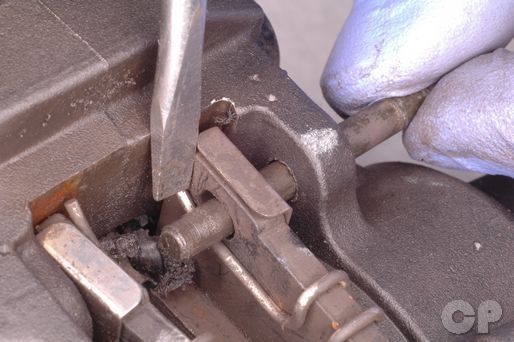
Push down the springs so that the pins fit over them.
Secure the pad pins with the clips

Install the brake pad cover.
Removal
If you plan to disassemble the caliper, drain the brake fluid. See the Brake Fluid topic for more information.
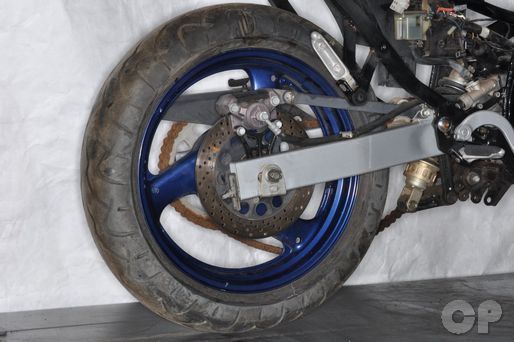
If you plan to disassemble the caliper go ahead and break loose the caliper housing bolts with a 14 mm socket. Remove the two brake caliper mounting bolts with a 12 mm socket.
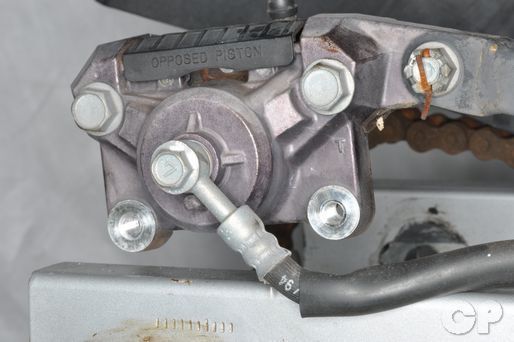
Remove the brake hose banjo bolt with a 12 mm socket. Discard the sealing washers. Allow the brake fluid to drain into a suitable container.
NOTE: Brake fluid is a corrosive chemical and can damage paints and some plastics. Avoid contact with skin.
Remove the cotter pin from the torque link bolt.
Hold the rear brake torque link bolt with a 14 mm wrench and loosen the nut with a 14 mm Socket.
Remove the torque link bolt, nut and spacer.
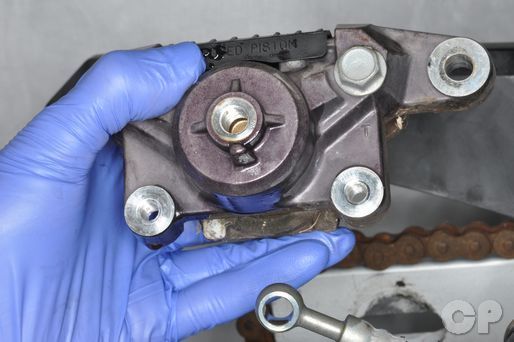
Lift the caliper up and off of the disc.
Disassembly
Remove the two caliper housing bolts with a 14 mm socket.
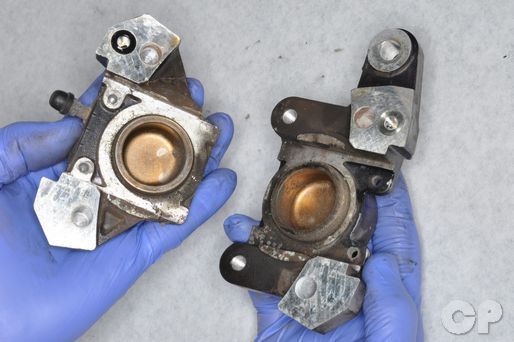
Separate the caliper halves
Remove the O-ring and discard it.
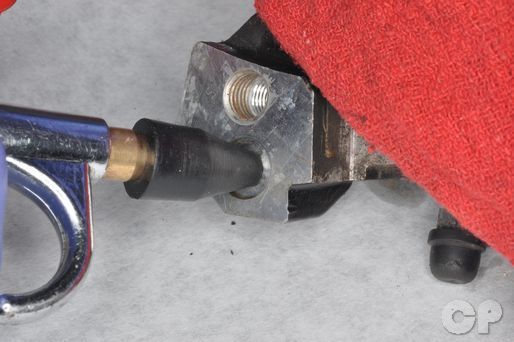
Place a thick rag over caliper piston and use compressed air to move the piston out. The piston is a tight fit in the brake caliper and will pop out with a lot of force. Repeat the procedure with the other piston.
NOTE: Always wear safety glasses when using compressed air and never point it directly at yourself or anyone else.
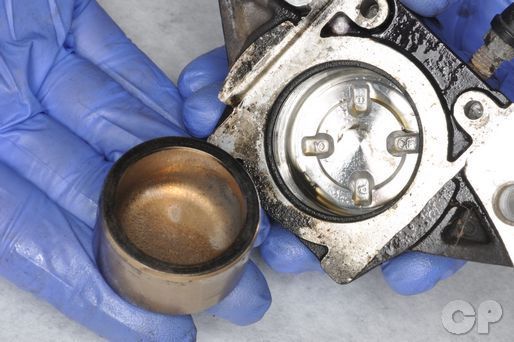
Remove the cylinder from the caliper.
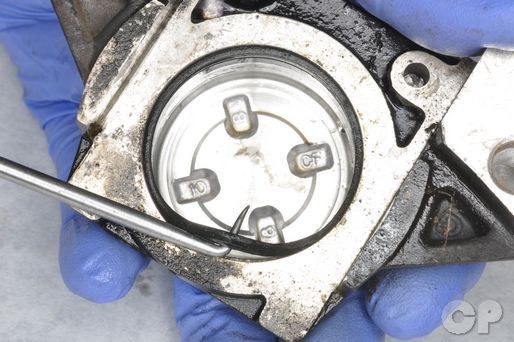
Remove the dust and fluid seals from the piston bores. Discard the old seals.
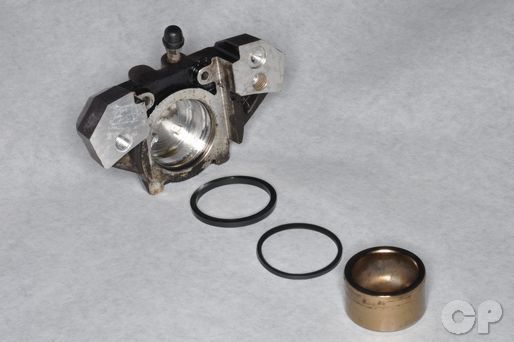
Inspect the pistons and bores for wear and damage.
Assembly
Clean all of the brake caliper components using aerosol brake cleaner and a lint free cloth. Lubricate the caliper pistons, the caliper piston bores and the new seals with DOT 4 brake fluid from a tightly sealed container.
Install the new fluid seals and dust seals into the caliper halves.

Install the pistons into their bores. Push the pistons all the way in with an old brake pad.
Coat the new O-ring in fresh brake fluid and set it in place.

Place the halves of the caliper together.
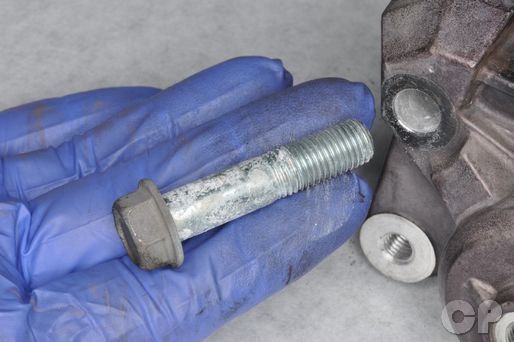
Insert the caliper bolts and tighten them hand tight.
Install the brake pads. See Above for more information.
Installation

Fit the brake disc between the brake pads if the rear wheel is installed.
Line up the torque link with its mounting point on the caliper. Insert the torque link bolt from the left side, place the spacer on the bolt and thread on the nut.
Hold the rear brake torque link bolt with a 14 mm wrench and torque the nut with a 14 mm Socket.
(Torque Link Nut Torque: 20 - 30 N-m or 11 - 14.5 lb-ft)
Insert the cotter pin through the torque link nut and bolt, and bend it as shown.

Connect the brake hose to the caliper with the banjo bolt and two new sealing washers. Torque the banjo bolt to specification with a 12 mm socket.
(Brake Hose Banjo Bolt Torque: 23 N-m or 16.5 lb-ft)

Fit the caliper to its mounting bracket and insert the two brake caliper mounting bolts. Torque the bolts to specification with a 12 mm socket.
| Item | N-m | ft-lb |
| Rear brake caliper mounting bolt (600) | 15 - 25 | 11.0 - 18.0 |
| Rear brake caliper mounting bolt (750) | 18 - 30 | 13.0 - 21.5 |
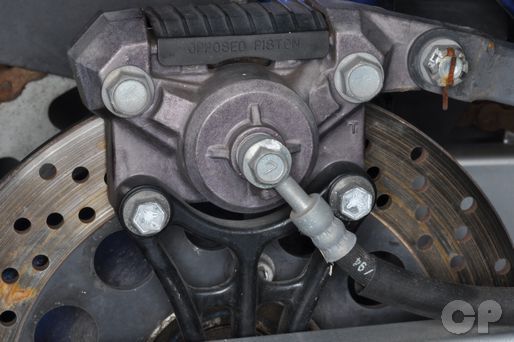
Torque the rear brake caliper housing bolts to specification with a 14 mm socket.
| Item | N-m | ft-lb |
| Rear brake caliper housing bolt (600) | 30 - 36 | 21.5 - 26.0 |
| Rear brake caliper housing bolt (750) | 28 - 32 | 20.0 - 23.0 |
Fill and bleed the brake fluid. See the Brake Fluid topic for more information.
Always check the brake function after working on the brake system.
Copyright - Cyclepedia Press LLC

Note: If you are viewing this document offline be sure to visit the latest version online at http://www.cyclepedia.com before attempting any repairs. Updates are made without notice.


